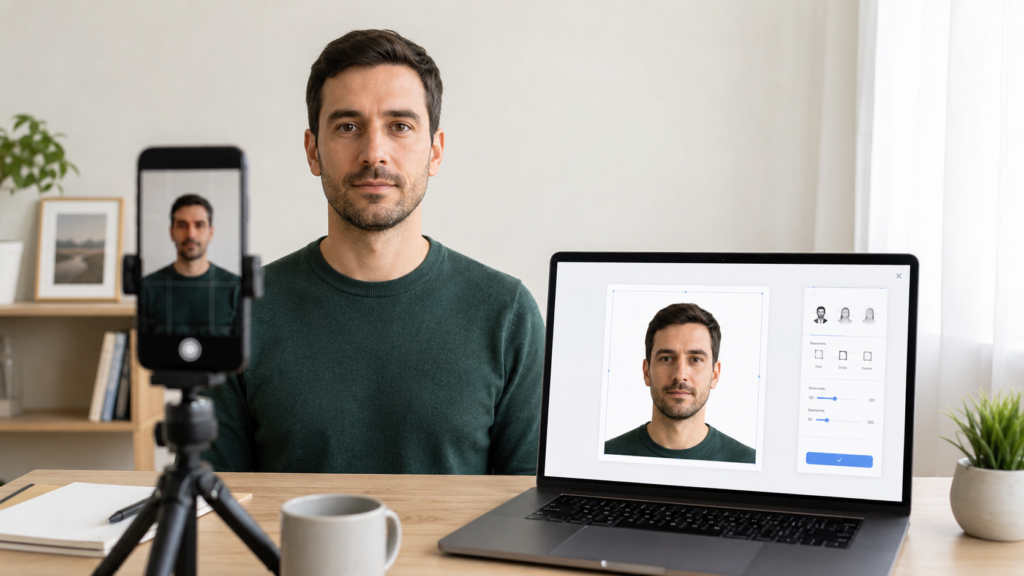
You snap a straightforward photo in front of a neutral background, upload it, and within seconds receive a version formatted for a passport or visa.
The process seems effortless. In reality, several adjustments happen behind the scenes. The image may be trimmed, resized, aligned, refined, and converted to meet the exact specifications required by an official authority.
Passport photos involve more precision than typical snapshots. An image that appears fine to the eye can still be rejected if the face is positioned incorrectly, the background is inconsistent, or the file does not meet technical standards.
Online passport photo tools are built to manage these details. While they do not replace official approval, they simplify the preparation process and reduce the need for manual editing or a visit to a professional studio.
Table of Contents
TogglePicking the Right Document First
Most online passport photo tools start by asking what you actually need the photo for.
It might seem like a small step, but it makes a big difference. There isn’t a single “passport photo size” that works everywhere. Requirements vary depending on the country and even the type of document. A passport photo might follow one set of rules, while a visa or ID card from the same country could follow another.
By selecting the correct document at the start, the tool knows exactly how to format the image. Instead of guessing measurements or trying to match guidelines manually, the user is working with a preset that’s already aligned with the application they’re preparing for.
It’s a simple step, but it saves a lot of back-and-forth later.
The Original Photo Still Matters
Online tools can do a lot, but they still depend on what you give them.
If the starting photo is clear and well-lit, everything that follows tends to work smoothly. If it isn’t, even the best software will struggle. That’s why it’s worth spending a few extra minutes getting the basics right before uploading anything.
Natural light usually works best. Standing near a window during the day often gives a softer, more even result than using overhead lights or a flash. The camera should be roughly at eye level, and the person in the photo should be facing straight ahead with their face fully visible.
The background doesn’t have to be perfect. A plain wall is ideal, but it doesn’t need to be studio-white. What matters more is that the space behind you isn’t cluttered or full of objects that blend into your outline.
One mistake people make is holding the phone too close to their face. This can slightly stretch or distort features, especially with front-facing cameras. It’s usually better to step back a bit and either use a timer or ask someone else to take the photo.
It’s also worth remembering that editing tools aren’t magic. They can fix small issues, like adjusting brightness or cleaning up the background, but they can’t fully correct a blurry or poorly lit image. If the photo doesn’t look right at the start, it’s often quicker to take another one than to try to fix it later.
How the Photo Is Cropped
After you upload the image, the tool looks for your face and roughly maps out key points like your eyes, chin, and the top of your head.
From there, it adjusts the framing so your face sits where it’s supposed to within the final image. This is something people often get wrong when they try to crop photos manually, either there’s too much empty space above the head, or the face ends up too large and cramped.
Instead of guessing, the software follows a preset layout for the selected document. It can also nudge the image slightly if your face is off-centre or if the shoulders are cut awkwardly.
It’s worth noting that cropping and resizing aren’t the same thing. Cropping decides what part of the photo stays in the frame, while resizing changes the overall dimensions of the file.
You need both to be right. It’s possible to have a photo that technically matches the required size but still looks wrong because the face isn’t positioned properly.
What Happens to the Background
This is usually where people run into trouble when trying to take a passport photo at home.
A wall might look perfectly white in real life, but once you take the picture, it can come out slightly grey, yellow, or uneven. Overhead lights can create shadows behind your head, and small details – like a door frame or a picture on the wall – suddenly become noticeable in the background.
That’s why many online passport photo makers replace the background entirely instead of trying to fix it.
The tricky part is doing this cleanly. Edges around hair, ears, and shoulders aren’t always simple, especially if the lighting isn’t great. If the cutout isn’t done properly, you might end up with missing strands of hair or a faint outline that makes the image look edited.
Ideally, the tool should only deal with the background and leave everything else alone. Passport photos are meant to show how you actually look, so anything that changes facial features or smooths out details too much can cause problems.
Basic adjustments are fine. Anything that starts to look like a filter isn’t.
Getting the Photo Ready to Use
Once the image has been cropped and the background sorted out, the next step is turning it into something you can actually submit.
For online applications, that usually means making sure the file meets a few technical requirements – things like size, format, and resolution. It’s easy to overlook this part. A photo might look perfectly fine on your phone or laptop, but still get rejected because it’s too large, too small, or saved in the wrong format.
Printing brings its own set of issues. Most printers and photo labs aren’t set up to produce a single passport-sized image on its own.
Instead, the photo is typically arranged as multiple copies on a standard-sized sheet. You can print it at home or use a local shop, then cut out the individual photos yourself.
One small detail that often causes problems is scaling. If the printer settings automatically adjust the image to “fit” the page, the final size can end up slightly off, which may be enough to cause issues with an application.
It’s also worth keeping the file in its original form until you submit it. Sending it through messaging apps or social media can reduce the quality without you noticing, since many platforms compress images by default.
Where PassportPhoto.online Fits In
One example of this kind of tool is PassportPhoto.online. In practice, the process is fairly straightforward: you pick the country and document you need, upload a photo, and the service adjusts it to match the required format.
What people tend to notice is not the technical side, but the time saved. Instead of figuring out exact measurements or trying to crop everything manually, the tool handles those details in the background.
That said, it does not remove the need for a decent starting photo. Lighting, positioning, and choosing the correct document still matter. The difference is that once you have a usable image, you do not have to spend time fine-tuning it yourself.
For many users, especially those who need a digital file quickly or prefer to take a few shots at home before settling on one, that convenience is the main reason these tools have become popular.
Why Many People Now Do This at Home
Not that long ago, getting a passport photo usually meant stopping by a studio or squeezing into one of those photo booths at a mall or train station. You paid, sat still for a few seconds, and trusted that everything was handled correctly.
That option is still there, but it’s no longer the default for everyone.
Now, it’s common to take a photo at home with a phone, try a few versions, and then use an online tool to sort out the technical details. The software can adjust the crop, clean up the background, and format the image so it matches what the application asks for.
It doesn’t remove the rules, you still need to follow them, but it takes away the need to measure everything yourself or guess whether the photo will be accepted.
For many people, that’s enough to turn what used to be a small errand into something they can finish in a few minutes without leaving home.